Mycopunk Beginner Guide: First Missions, Loadouts and Upgrades
Play the tutorial mission, pick Scrapper or Wrangler, and spend your first upgrades on movement and survivability before damage. Push threat level 2 only after your first two weapons are upgraded, because enemy density, not health, is what kills new crews.
Mycopunk drops you on a fungal planet with a gun, a robot and almost no explanation. The first hour is the hardest part of the game: enemy density ramps faster than your upgrades, and the mission select screen throws threat levels and modifiers at you before you know what your grid does. This page is the shortest path from "I just installed this" to a clean extraction on threat 2.
What a mission actually asks of you
Every mission has a main objective, optional side objectives, and an extraction. You pick a mission from the ship, choose a threat level, drop in, finish the objective, call the drop pod and get inside it. Since 1.0, if nobody on the crew reaches the pod, the mission fails outright — no partial credit, no loot.
That rule changes how you play the last thirty seconds of every mission. When the pod is called, the fight is no longer about kills; it is about the walk back. Save a movement ability, clear the path first, and go early rather than finishing one more side objective.
Enemies come to you. Farming mobs is not the loop: objectives spawn the pressure, and everything you actually want — upgrades, resources, XP — comes out of the end-of-mission screen. If you are wandering the map looking for something to shoot, you are losing time you could spend extracting.
Pick an employee, not a "main"
There are five employees in 1.0: Wrangler, Bruiser, Scrapper, Glider and the Mycologist. They are classes, and the game rewards you for levelling all of them — your player level is derived from the total level of your employees, and upgrade rotations unlock as that number climbs.
| Employee | Feel | Good first pick when |
|---|---|---|
| Scrapper | Grapple, explosives, repositioning | You want the safest solo start |
| Wrangler | Lasso, team repositioning | You play with friends and like setting up kills |
| Bruiser | Heavy, tanky, close range | You keep dying in melee crowds |
| Glider | High mobility, high skill | You are comfortable with movement shooters |
| Mycologist | Sporelift, Fungal Skewer, infection | You have already rescued her in Expedition Alpha |
Scrapper is the recommendation for most new players: the grapple answers "I am standing in the wrong place" better than any damage upgrade, and explosives clear the piles that form around objectives. The Mycologist is the strongest 1.0 addition, but she is gated behind Expedition Alpha, so she is not an option on day one.
Spend your first upgrades on movement, not damage
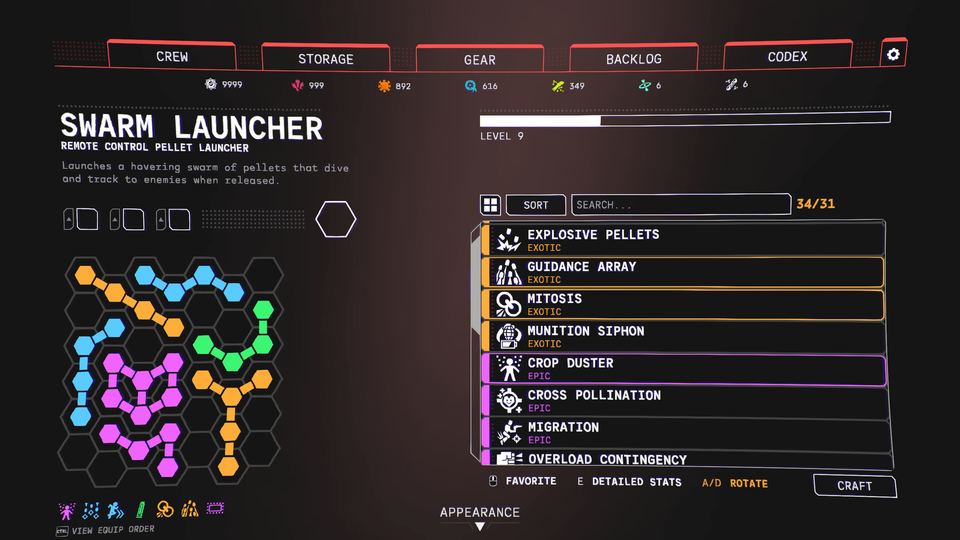
Upgrades are shapes on a hex grid. Damage numbers look tempting, but the first two hours are decided by whether you can leave a fight you are losing. Movement, jump, reload speed and survivability upgrades carry a new crew much further than a 15% damage roll.
Two mechanics matter immediately. Pattern size: in 1.0 most upgrade stats scale with the size of their pattern, so infusing a big pattern into a small upgrade buffs it, and shrinking a big upgrade weakens it. Turbocharges are a separate augments tier that change behaviour rather than raw stats — when one drops, read it before assuming it is an upgrade.
Do the boring economy once
Six materials feed crafting: Gats, Romphus, Gussula, Beezia, Yeuco and Saxonite. Gats come from anything. The other five are biome-specific, and Saxonite only rolls from threat level 2 upward. That is the real reason to move off threat 1 — not bragging rights, but the material that unlocks most of the good upgrades.
Break resource pods when you see them, especially in Titan City and Gravity Farms, where Romphus grows directly out of enemies. You do not need to detour for them, but you should not walk past them either; crafting an undiscovered upgrade is far more expensive than upgrading one you already own.
Mistakes worth avoiding
- Pushing threat too early. Threat raises enemy count, damage and elite frequency, not just health. A clean threat 1 extraction beats a messy threat 3 wipe.
- Ignoring the HUB. Between missions the ship has vendors, terminals and Roachard, and the 1.0 rework moved a lot of progression there. Two minutes of reading saves an hour of confusion.
- Never trying new weapons. The arsenal is deliberately weird; every family plays differently, and the range which feels bad on one employee feels great on another.
- Fighting the last wave instead of leaving. The pod timer is the objective.
When it clicks
New players consistently report the same thing: the first mission or two feels flat, and then somewhere around two hours in, the enemy variety and the grid system lock together. If the opening feels thin, push through the tutorial region and one region beyond it before deciding.
One practical note for the first launch: Mycopunk does not always detect your resolution or aspect ratio correctly. If the game looks stretched or letterboxed, fix it in the graphics settings before you play, rather than fighting it mid-mission.
Last checked 2026-10-21 against the Steam store data, the 1.0 announcement and launch patch notes, and Steam Community guides.